
4
Preparing the trimmer for use (Fig. 2)
2
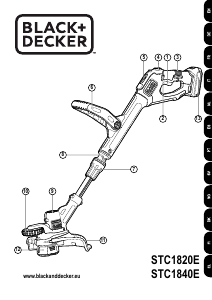
• Take the trimmer and the guard (6) out of
the box.
• Remove the guard screw (22) which is
located on the base of the trimmer body
(1) (Fig. 2.1).
• Place the guard into the channel on the
trimmer body.
• Push the guard fully home, on one side
first, until the guard is flush with the body.
Repeat for the other side (Fig. 2.2).
• Replace the guard screw (Fig. 2.3).
• If correctly assembled, the guard will now
be secured to your trimmer.
• In transit, your trimmer is packed in
‘Edging’ mode, if you want to ‘Trim’ refer
to the section ‘How to convert between
the trimming and edging mode’.
• In transit, the end of the cutting line (5) is
taped to the side of the spool cover (8).
Please discard the tape to release the
length of line. There should be a
minimum of 9cm (3.5") of cutting line
protruding from the spool housing (12)
before using your trimmer.
Note: When your machine is operated for
the first time any excess line will be cut off by
the line trimming blade (7) housed in the
guard. This is also the case for any
subsequent line adjustment. Because line
cut off by the blade in the guard may be
ejected, it is important that the amount of
excess line is kept to a minimum. Where an
excessive amount of line is pulled out, the
line should be cut back to the outside of the
guard before switching on your trimmer. Cut
the line off on the trimmer blade by hand.
• Always ensure that the spool cover is
secure before and after use.
How to use your trimmer (Fig. A - K)
In order to get the most from your trimmer please be
sure to follow the techniques shown. Do not be
impatient; you will obtain the best results by
experience and by following these simple rules.
A
Do not use your trimmer without
its guard.
B
Do not cut wet grass; best results are
achieved when the grass is dry.
Trimming
• To switch on your trimmer, squeeze the
trigger switch (21).
• To switch the unit off, release the
trigger switch.
• To carry the trimmer when not in use,
it is preferred that you use the secondary
handle (2).
C
Cut at an angle and with the tip of the
cutting line (5).
D
Swing the trimmer gently from side to side.
E
Do not overload the trimmer. It operates best
at high speeds.
F
On long grass, start at the top.
G
Take small cuts.
H
Use the edge of the guard (6) to keep the
trimmer away from hard surfaces and
delicate items.
Edging
I
Best results are achieved on edges greater
than 50mm deep.
Note: Your trimmer is a maintenance tool for
trimming overhanging grass and should not
be used to create edges. Edges can be
created using an edging spade.
J
With the skid (25) on the grass edge and the
edge guide (9) hooked over the edge, pull
the unit along while keeping the edge guide
in contact with the lawn edge.
A closer cut can be achieved by angling
the trimmer.
How to convert between the
trimming and edging mode
(Fig. 3)
In addition to conventional trimming (Fig. D),
your trimmer can be used to trim
overhanging grass along lawn edges and
flower beds (Fig. J).
3
To convert your trimmer between the
trimming and edging mode:
Unlock
• With the trimmer switched off and the
edge guide (9) resting on the ground,
place one hand on the switch handle
(20). Using your other hand, turn the
locking ring (4) anti-clockwise, as far as
it will go (approximately quarter of a turn)
(Fig. 3.1).
Convert
• While keeping hold of the switch handle,
grasp the trimmer body (1) and rotate
half a turn in the direction of the arrow
(24), until the body ‘clicks’ into position
(Fig. 3.2).



Partecipa alla conversazione su questo prodotto
Qui puoi condividere cosa pensi di Black and Decker GL580 Tagliabordi. Se hai una domanda, leggi prima attentamente il manuale. La richiesta di un manuale può essere effettuata utilizzando il nostro modulo di contatto.
rispondi | È stato utile (0) (Tradotto da Google)
rispondi | È stato utile (0) (Tradotto da Google)