
PZ9161
PZ9162
EN | Instruction manual
NL | Gebruiksaanwijzing
FR | Mode d’emploi
DE | Bedienungsanleitung
ES | Manual de usuario
PT | Manual de utilizador
IT | Manuele utente
SV | Bruksanvisning
PL | Instrukcja obsługi
CS | Návod na použití
SK | Návod na použitie
RU | Руководство по
эксплуатации
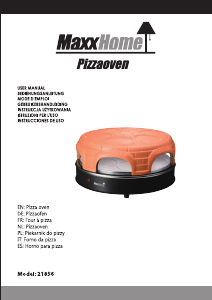
PARTS DESCRIPTION / ONDERDELENBESCHRIJVING / DESCRIPTION DES PIÈCES / TEILEBESCHREIBUNG /
DESCRIPCIÓN DE LAS PIEZAS / DESCRIÇÃO DOS COMPONENTES / DESCRIZIONE DELLE PARTI /
BESKRIVNING AV DELAR / OPIS CZĘŚCI / POPIS SOUČÁSTÍ / POPIS SÚČASTÍ / ПИСАНИЕ ЗАПЧАСТИ
1
2
5
7
6
8
3
4 9
WWW.TRISTAR.EU
Tristar Europe B.V. | Jules Verneweg 87
5015 BH Tilburg | The Netherlands
ENInstruction manual
SAFETY
• By ignoring the safety instructions the
manufacturer cannot be held responsible for
the damage.
• If the supply cord is damaged, it must be
replaced by the manufacturer, its service
agent or similarly qualified persons in order to
avoid a hazard.
• Never move the appliance by pulling the cord
and make sure the cord cannot become
entangled.
• The appliance must be placed on a stable,
level surface.
• The user must not leave the device
unattended while it is connected to the supply.
• This appliance is only to be used for
household purposes and only for the purpose
it is made for.
• This appliance shall not be used by children
aged less than 8 years. This appliance can be
used by children aged from 8 years and above
and persons with reduced physical, sensory or
mental capabilities or lack of experience and
knowledge if they have been given
supervision or instruction concerning use of
the appliance in a safe way and understand
the hazards involved. Children shall not play
with the appliance. Keep the appliance and its
cord out of reach of children aged less than 8
years. Cleaning and user maintenance shall
not be made by children unless older than 8
and supervised.
• To protect yourself against an electric shock,
do not immerse the cord, plug or appliance in
the water or any other liquid.
• Only use the appropriate connector for this
device.
• The appliance is to be connected to a socket-
outlet having an earthed contact (for class I
appliances).
• The appliance is not intended to be operated
by means of an external timer or a separate
remote-control system.
• WARNING: If the surface is cracked, switch
off the appliance to avoid the possibility of an
electric shock.
• Keep the appliance and its cord out of reach
of children less than 8 years.
• The temperature of accessible surfaces may
be high when the appliance is operating.
• Surface is liable to get hot during use.
• This appliance is intended to be used in
household and similar applications such as:
– Staff kitchen areas in shops, offices and other working
environments.
– By clients in hotels, motels and other residential type
environments.
– Bed and breakfast type environments.
– Farm houses.
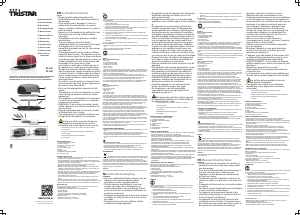
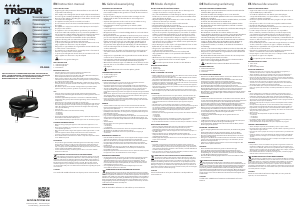
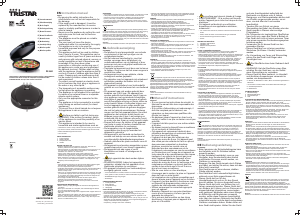
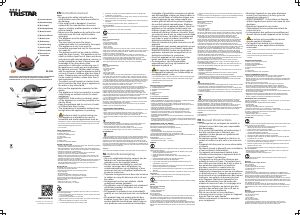
PARTS DESCRIPTION
1. Handmade terracotta dome
2. Heating element
3. Non-stick coated grill plate
4. Power plug
5. Power indicator light
6. Base
7. Dough cutter
8. Stainless steel pizza paddles
9. Connection cord
BEFORE THE FIRST USE
• Take the appliance and accessories out the box. Remove the stickers,
protective foil or plastic from the device.
• Place the appliance on a flat stable surface and hold at least 30 cm.
free space around it. Make sure the unit is placed in a upright position.
• Check the contents for completeness.
• In case of incomplete delivery or damage, do not operate the
appliance. Return it to your dealer immediately.
• Before inserting the power plug into the outlet, check that the main
voltage to be used matches that of the appliance. You can find the
required information on the nameplate.
• Connect the mains plug to a properly installed shockproof socket only.
• Do NOT plug the main plug into the wall outlet before the device is
fully assembled! When inserting the main plug, the appliance
immediately starts to heat up!
• The connection cord can be used to connect multiple units to each
other.
• On the front side of the main unit you can plug in the power cord.
• On the back of side of the main unit you can plug in a connection cord.
• NOTE: the maximum amount of units connected to one another is 5.
NOTES ON USE
The dough may not be too thick, as the rising dough can come into
contact with the heating element.
The baking time depends on the following factors:
• Type of dough
• Dough toppings
• The number of pizzas baked at the same time
• Ambient conditions (e.g. temperature, draught)
Preparation time:
• Italian crust (thin): 5-7 minutes
• American crust (thick): > 7 minutes
USE
The terracotta dome of the appliance gets very hot! Do not touch the dome
during operation.
ü Place the grill plate onto the brackets in such a way that the cutout is
on the heating rods.
ü Place the terracotta dome on the base.
ü Connect any additional units if desired.
ü Plug the power cord into the wall outlet. The power control lamp is on.
ü Preheat the appliance for approx. 30 minutes
1. Cut the prepared dough with the dough cutter.
2. Place the cut dough on the pizza paddle and cover the dough with
ingredients of your choice.
3. Insert the pizza paddle with the dough in the opening of the terracotta
dome and place it on the grill plate.
4. Remove the pizza once the dough is slightly brown and the topping is
well done.
5. If you wish to prepare another piece, repeat point 2-4.
End of operation
• Unplug the power cord from the wall outlet. The power control lamp turns
off.
• Allow the appliance to cool down completely!
• Disconnect any additional units.
Risk of burns: Do not touch the dome until it is completely cooled
down!
RECIPE
Basic recipe pizza dough
200 g flour
100 ml lukewarm water
½ packet of dried yeast
½ tablespoon of olive oil
1 pinch of salt
1 pinch of sugar
1. Sieve the flour and then mix with the salt in a bowl. Stir the yeast and
sugar into the lukewarm water until dissolved. Work into the flour using the
dough hook on a hand-held electric whisk. Add the olive oil and knead
together to create a smooth dough.
2. using your hands, vigorously knead the dough on a floured work
surface, and then shape it into a ball. Put the dough into a bowl and then
cover and leave to rise in a warm, draught-free place for 45 minutes.
3. Knead the dough on the floured surface again and roll it out.
4. Cut the dough with the dough cutter and place it on the pizza paddle.
Then spread the dough with tomato sauce and cover as desired.
RECIPE
Basis recipe puff pastry
270 g flour
25 g butter (melted)
1 pinch of salt
1 egg yolk
125 ml water (cold)
250 g butter (cold)
1. Sift 250 g flour into a bowl, add melted butter. Knead the butter and
some flour with your hands to create crumbs. Add salt and egg yolk and
then gradually add 125 ml of cold water. Mix everything with the hands to
a smooth dough. Wrap in cling film and put in a cool place for 30 minutes.
2. Cut the cold butter into small cubes and dust the remaining flour over it.
Knead the butter and the flour well and place between 2 layers of cling
film. Roll out the butter to a square of about 19 cm. place it in the
refrigerator for at least 30 minutes to cool down.
3. Roll out the flour dough on a small amount of flour to a rectangle of
about 20 x 40 cm. place the cold butter on one half of the dough and fold
over the other half of the dough. Firmly press down the edges of the
dough. Roll the dough packet into an elongated rectangle. From the
bottom and the top, fold over about one third of the puff pastry to the
middle. Roll out this three-layered dough pack again. Once again, fold
over the rolled puff pastry from the top and bottom to a third and place the
folded dough packet in the refrigerator for at least 30 minutes.
4. roll out the puff pastry on a small amount of flour once more and fold it
over one third from the bottom and the top to the middle. Store in a cool
place for 30 minutes.
By rolling out and folding (also called “touring”) as well as cooling off the
puff pastry, the fine leafy layers are created.
5. Roll out the puff pastry again. Cut a piece twice as big as the pizza
paddle. Cover as desired and fold half.
CLEANING AND MAINTENANCE
• Before cleaning, unplug the appliance and wait for the appliance to cool
down.
• Never immerse the electrical device in water or any other liquid.
• Never use harsh and abrasive cleaners, scouring pad or steel wool, on
other parts of the device. Use a damp cloth to clean instead.
• Clean the pizza paddle and grill plate in a warm rinsing bath after every
use.
Terracotta dome and base
• The terracotta dome needs to completely cooled off before getting into
contact with water. Otherwise the terracotta dome may burst!
• Clean the dome and base only with a damp cloth.
• The terracotta dome may not soak up water. It can dry in the air.
• Only use the appliance again once the dome is completely dry.
ENVIRONMENT
This appliance should not be put into the domestic garbage at the
end of its durability, but must be offered at a central point for the recycling
of electric and electronic domestic appliances. This symbol on the
appliance, instruction manual and packaging puts your attention to this
important issue. The materials used in this appliance can be recycled. By
recycling of used domestic appliances you contribute an important push to
the protection of our environment. Ask your local authorities for information
regarding the point of recollection.
Support
You can find all available information and spare parts at www.tristar.eu!
NLGebruiksaanwijzing
VEILIGHEID
• Als u de veiligheidsinstructies negeert, kan de
fabrikant niet verantwoordelijk worden
gehouden voor de mogelijke schade.
• Als het netsnoer beschadigd is, moet het
worden vervangen door de fabrikant, de
onderhoudsmonteur van de fabrikant of door
personen met een soortgelijke kwalificatie om
gevaar te voorkomen.
• Verplaats het apparaat nooit door aan het snoer
te trekken en zorg dat het snoer niet in de war
kan raken.
• Het apparaat moet op een stabiele, vlakke
ondergrond worden geplaatst.
• De gebruiker mag het apparaat niet onbeheerd
achterlaten wanneer de stekker zich in het
stopcontact bevindt.
• Dit apparaat is uitsluitend voor huishoudelijk
gebruik en voor het doel waar het voor bestemd
is.
• Dit apparaat mag niet worden gebruikt door
kinderen jonger dan 8 jaar. Dit apparaat kan
worden gebruikt door kinderen vanaf 8 jaar en
door personen met verminderde lichamelijke,
zintuiglijke of geestelijke vermogens of gebrek
aan de benodigde ervaring en kennis indien ze
onder toezicht staan of instructies krijgen over
hoe het apparaat op een veilige manier kan
worden gebruikt alsook de gevaren begrijpen
die met het gebruik samenhangen. Kinderen
mogen niet met het apparaat spelen. Houd het
apparaat en het netsnoer buiten bereik van
kinderen jonger dan 8 jaar. Laat reiniging en
onderhoud niet door kinderen uitvoeren, tenzij
ze ouder zijn dan 8 jaar en onder toezicht staan.
• Dompel het snoer, de stekker of het apparaat
niet onder in water of andere vloeistoffen om
elektrische schokken te voorkomen.
• Gebruik uitsluitend de juiste connector voor dit
apparaat.
• Het apparaat moet worden aangesloten op een
geaard stopcontact (voor klasse I-apparaten).
• Het apparaat is niet bedoeld om bediend te
worden met behulp van een externe timer of
een afzonderlijk afstandbedieningssysteem.
• WAARSCHUWING: Indien het oppervlak is
gebarsten, schakel dan het apparaat uit om
elektrische schokken te voorkomen.
• Houd het apparaat en het netsnoer buiten
bereik van kinderen jonger dan 8 jaar.
• De temperatuur van de toegankelijke
oppervlakken kan hoog zijn wanneer het
apparaat in gebruik is.
• Het oppervlak wordt heet tijdens gebruik.
• Dit apparaat is bedoeld voor huishoudelijk en
soortgelijk gebruik, zoals:
– Personeelskeukens in winkels, kantoren en andere
werkomgevingen.
– Door gasten in hotels, motels en andere residentiële
omgevingen.
– Bed&Breakfast-type omgevingen.
– Boerderijen.
BESCHRIJVING VAN ONDERDELEN
1. Handgemaakte terracotta koepel
2. Verwarmingselement
3. Grillplaat met antiaanbaklaag
4. Stekker
5. Voedingslampje
6. Basis
7. Deegsnijder
8. Roestvrijstalen pizzaspatels
9. Aansluitsnoer
VÓÓR HET EERSTE GEBRUIK
• Haal het apparaat en de accessoires uit de doos. Verwijder de stickers,
de beschermfolie of het plastic van het apparaat.
• Plaats het apparaat op een vlakke, stabiele ondergrond en houd
minimaal 30 cm vrije ruimte rondom het apparaat. Zorg ervoor dat het
apparaat rechtop wordt geplaatst.
• Controleer de inhoud van de doos.
• Gebruik het apparaat niet als het pakket niet compleet is of als u
beschadigingen ziet. Retourneer het product in dit geval direct.
• Controleer voordat u de stekker in het stopcontact steekt of de
netspanning overeenkomt met die van het apparaat. U vindt deze
informatie op het typeplaatje.
• Sluit de stekker alleen aan op een juist geïnstalleerd, schokbestendig
stopcontact.
• Steek de stekker NIET in het stopcontact voordat het apparaat helemaal
in elkaar is gezet. Wanneer u de stekker in het stopcontact steekt, begint
het apparaat meteen met opwarmen.
• Met het aansluitsnoer kunt u meerdere apparaten aan elkaar koppelen.
• U kunt het netsnoer aansluiten aan de voorkant van het apparaat.
• Aan de achterkant van het apparaat kunt u een aansluitsnoer aansluiten.
• OPMERKING: er kunnen maximaal 5 apparaten op elkaar worden
aangesloten.
OPMERKINGEN OVER HET GEBRUIK
Het deeg moet niet te dik zijn, omdat het rijzende deeg anders in contact
kan komen met het verwarmingselement.
De baktijd is afhankelijk van de volgende factoren:
• Het type deeg
• De pizzatoppings
• Het aantal pizza's dat tegelijkertijd wordt gebakken
• Omgevingsomstandigheden (bijv. temperatuur, tocht)
Bereidingstijd:
• Italiaanse kort (dun): 5-7minuten
• Amerikaanse korst (dik): > 7minuten
GEBRUIK
De terracotta koepel van het apparaat wordt erg heet. Raak de koepel
tijdens gebruik niet aan.
ü Plaats de grillplaat zo op de beugels dat de uitsparing zich op de
verwarmingselementen bevindt.
ü Plaats de terracotta koepel op de basis.
ü Sluit eventueel een extra apparaat aan.
ü Steek de stekker in het stopcontact. Het voedingslampje gaat
branden.
ü Laat het apparaat ongeveer 30 minuten opwarmen.
1. Snijd het bereide deeg met de deegsnijder.
2. Leg het gesneden deeg op de pizzaspatel bedek het deeg met
ingrediënten naar keuze.
3. Steek de pizzaspatel met het deeg in de opening van de terracotta
koepel en leg de spatel op de grillplaat.
4. Haal de pizza wanneer het deeg licht gebruind is en de ingrediënten
gaar zijn.
5. Als u nog een pizzastuk wilt bereiden, herhaalt uw stap 2 tot en met 4.
Na gebruik
• Haal de stekker uit het stopcontact. Het voedingslampje gaat uit.
• Laat het apparaat volledig afkoelen.
• Ontkoppel eventuele extra apparaten.
Risico op brandwonden: raak de koepel niet aan tot deze volledig
is afgekoeld.
RECEPT
Basisrecept pizzadeeg
200 g bloem
100 ml lauwwarm water
½ pakje gedroogde gist
½ eetlepel olijfolie
Een snufje zout
Een schepje suiker
1. Zeef de bloem en meng deze in een kom met het zout. Laat de gist en
het suiker al roerend oplossen in het lauwwarme water. Gebruik een
handmixer met deeghaken terwijl u het water aan de bloem toevoegt.
Voeg de olijfolie toe en kneed het geheel tot een glad deeg.
2. Leg het deeg op een met bloem bestrooid oppervlak. Kneed het deeg
stevig met uw handen en maak er een bal van. Doe het deeg in een kom,
dek de kom af en laat het deeg 45 minuten op een warme, tochtvrije plek
rijzen.
3. Kneed het deeg opnieuw op het met bloem bestrooide oppervlak en rol
het uit.
4. Snijd het deeg met de deegsnijder en leg het op de pizzaspatel. Bestrijk
het deeg met tomatensaus en voeg ingrediënten naar keuze toe.
RECEPT
Basisrecept bladerdeeg
270 g bloem
25 g boter (gesmolten)
Een snufje zout
1 eierdooier
125 ml water (koud)
250 g boter (koud)
1. Zeef 250 g bloem in een kom en voeg de gesmolten boter toe. Kneed
de boter en wat bloem met uw handen om kruimels te maken. Voeg zout
en de eierdooier toe en schenk er beetje bij beetje 125 ml koud water bij.
Meng alles met uw handen tot een glad deeg. Wikkel het deeg in
huishoudfolie en laat het 30 minuten op een koele plek rusten.
2. Snijd de koude boter in kleine blokjes en strooi hier de resterende
bloem overheen. Kneed de boter en de bloem goed en leg het mengsel
tussen twee lagen huishoudfolie. Rol de boter uit tot een vierkant van
ongeveer 19 cm. Laat het minimaal 30 minuten afkoelen in de koelkast.
3. Rol het bloemdeeg op een kleine hoeveelheid bloem uit tot een
rechthoek van ongeveer 20 x 40 cm. Leg de koude boter op de ene helft
van het deeg en vouw de andere helft eroverheen. Druk de randen van het
deeg goed aan. Rol het deegpakketje tot een lange rechthoek. Vouw
ongeveer een derde van het bladerdeeg naar het midden. Doe dit aan de
bovenkant en aan de onderkant. Het deeg is nu drie lagen dik. Rol dit
opnieuw uit. Vouw de bovenkant en de onderkant van het bladerdeeg
opnieuw tot een derde naar binnen en laat het opgevouwen deegpakketje
minimaal 30 minuten rusten in de koelkast.
4. Rol het bladerdeeg opnieuw uit op een kleine hoeveelheid bloem en
vouw een derde vanaf de bovenkant en de onderkant naar binnen. Laat
het 30 minuten op een koele plek rusten.
Door het bladerdeeg uit te rollen en te vouwen (ook wel 'toureren'
genoemd) en het te laten afkoelen, krijgt u die dunne laagjes die het
bladerdeeg luchtig maken.
5. Rol het bladerdeeg opnieuw uit. Snijd er een stuk af dat twee keer zo
groot is als de pizzaspatel. Beleg het naar wens en vouw het dubbel.
REINIGING EN ONDERHOUD
• Verwijder voor reiniging de stekker uit het stopcontact en wacht tot het
apparaat is afgekoeld.
• Dompel het elektrische apparaat nooit onder in water of andere
vloeistoffen.
• Gebruik nooit agressieve of schurende reinigingsmiddelen,
schuursponzen of staalwol op andere delen van het apparaat. Gebruik in
plaats daarvan een vochtige doek om te reinigen.
• Was de pizzaspatel en de grillplaat na elk gebruik af met warm water.
Terracotta koepel en basis
• De terracotta koepel moet volledig afgekoeld zijn voordat deze in contact
komt met water. Anders kan de terracotta koepel barsten.
• Maak de koepel en de basis uitsluitend schoon met een vochtige doek.
• De terracotta koepel neemt mogelijk geen water op. U kunt deze aan de
lucht laten drogen.
• Gebruik het apparaat pas opnieuw wanneer de koepel volledig droog is.
MILIEU
Dit apparaat mag aan het einde van de levensduur niet bij het
normale huisafval worden gedeponeerd, maar moet bij een speciaal
inzamelpunt voor hergebruik van elektrische en elektronische apparaten
worden aangeboden. Het symbool op het apparaat, in de
gebruiksaanwijzing en op de verpakking attendeert u hierop. De in het
apparaat gebruikte materialen kunnen worden gerecycled. Met het
recyclen van gebruikte huishoudelijke apparaten levert u een belangrijke
bijdrage aan de bescherming van ons milieu. Informeer bij uw lokale
overheid naar het inzamelpunt.
Support
U kunt alle beschikbare informatie en reserveonderdelen vinden op
www.tristar.eu!
FRManuel d'instructions
SÉCURITÉ
• Si vous ignorez les consignes de sécurité, le
fabricant ne peut être tenu pour responsable
des dommages.
• Si le cordon d'alimentation est endommagé, il
doit être remplacé par le fabricant, son
réparateur ou des personnes qualifiées afin
d'éviter tout risque.
• Ne déplacez jamais l'appareil en tirant sur le
cordon et veillez à ce que celui-ci ne s'enroule
pas.
• L'appareil doit être posé sur une surface stable
et nivelée.
• Ne laissez jamais le dispositif sans surveillance
s'il est connecté à l'alimentation.
• Cet appareil est uniquement destiné à des
utilisations domestiques et seulement dans le
but pour lequel il est fabriqué.
• Cet appareil ne doit pas être utilisé par des
enfants de moins de 8 ans. Cet appareil peut
être utilisé par des enfants de 8 ans ou plus et
des personnes présentant un handicap
physique, sensoriel ou mental voire ne
disposant pas des connaissances et de
l'expérience nécessaires en cas de surveillance
ou d'instructions sur l'usage de cet appareil en
toute sécurité et de compréhension des risques
impliqués. Les enfants ne doivent pas jouer
avec l'appareil. Maintenez l'appareil et son
cordon d'alimentation hors de portée des
enfants de moins de 8 ans. Le nettoyage et la
maintenance utilisateur ne doivent pas être
confiés à des enfants sauf s'ils ont 8 ans ou
plus et sont sous surveillance.
• Afin de vous éviter un choc électrique,
n'immergez pas le cordon, la prise ou l'appareil
dans de l'eau ou autre liquide.
• Utilisez uniquement le connecteur approprié
pour cet appareil
• Branchez l'appareil sur une prise électrique
munie d'une connexion à la terre (pour les
appareils de catégorie I).
• L'appareil n'est pas destiné à fonctionner avec
un dispositif de programmation externe ou un
système de télécommande indépendant.
• AVERTISSEMENT: Si la surface est fissurée,
arrêtez l'appareil pour éviter tout risque de choc
électrique.
• Maintenez l'appareil et son cordon
d'alimentation hors de portée des enfants de
moins de 8 ans.
• La température des surfaces accessibles peut
devenir élevée quand l'appareil est en fonction.
• La surface est susceptible de devenir
chaude pendant l'utilisation.
• Cet appareil est destiné à une utilisation
domestique et aux applications similaires,
notamment:
– Coin cuisine des commerces, bureaux et autres
environnements de travail.
– Hôtels, motels et autres environnements de type résidentiel.
– Environnements de type chambre d’hôtes.
– Fermes.
DESCRIPTION DES PIÈCES
1. Dôme en terre cuite fait à la main
2. Élément de chauffage
3. Plaque de gril antiadhésive
4. Prise de courant
5. Témoin lumineux d'alimentation
6. Base
7. Coupe-pâte
8. Palettes à pizza en acier inoxydable
9. Cordon d'interconnexion
AVANT LA PREMIÈRE UTILISATION
• Sortez l'appareil et les accessoires hors de la boîte. Retirez les
autocollants, le film protecteur ou le plastique de l'appareil.
• Placez l'appareil sur une surface stable plate et assurez un dégagement
tout autour d'au moins 30 cm. Assurez-vous que l'appareil est monté en
position verticale.
• Vérifiez que le contenu est complet.
• En cas de livraison incomplète ou de dommages, ne pas faire
fonctionner l'appareil. Retournez-le aussitôt à votre distributeur.
• Avant d'insérer la fiche d'alimentation dans la prise, vérifiez que la
tension principale correspond à celle de l'appareil. Vous trouverez les
informations nécessaires sur la plaque signalétique.
• Ne branchez la fiche secteur que sur une prise de courant résistante aux
chocs correctement installée.
• NE branchez PAS la fiche principale dans la prise murale avant que
l'appareil ne soit complètement assemblé! Si vous branchez la fiche
secteur, l'appareil commence immédiatement à chauffer!
• Le cordon d'interconnexion permet de connecter plusieurs unités entre
elles.
• Branchez le cordon d'alimentation à l'avant de l'unité principale.
• Branchez le cordon d'interconnexion à l'arrière de l'unité principale.
• NB: 5unités maximum peuvent être connectées les unes aux autres.
REMARQUES SUR L'UTILISATION
La pâte ne doit pas être trop épaisse, car elle peut entrer en contact avec
l'élément chauffant.
Le temps de cuisson dépend des facteurs suivants:
• Type de pâte
• Garnitures de pâte
• Le nombre de pizzas cuites en même temps
• Conditions ambiantes (p. ex. température, courant d'air)
Temps de préparation:
• Croûte italienne (fine): 5-7 minutes
• Croûte américaine (épaisse): 7 minutes
UTILISATION
Le dôme en terre cuite de l'appareil devient très chaud! Ne touchez pas le
dôme pendant le fonctionnement.
ü Placez la plaque du gril sur les supports de manière à ce que la
découpe se trouve sur les barres chauffantes.
ü Posez le dôme en terre cuite sur la base.
ü Connectez au besoin une ou plusieurs autres unités.
ü Branchez le cordon d'alimentation dans une prise murale. Le témoin
lumineux d'alimentation s'allume.
ü Préchauffez l'appareil pendant environ 30 minutes.
1. Découpez la pâte préparée à l'aide du coupe-pâte.
2. Déposez la pâte coupée sur la palette à pizza et recouvrez-la avec les
ingrédients de votre choix.
3. Introduisez la palette à pizza avec la pâte dans l'ouverture du dôme en
terre cuite et placez-la sur la plaque du gril.
4. Enlevez la pizza une fois que la pâte est légèrement dorée et que la
garniture est bien cuite.
5. Si vous souhaitez préparer une nouvelle pizza, répétez les points2 à
4.
Fin de l'opération
• Débranchez le cordon d'alimentation de la prise murale. Le témoin
lumineux d'alimentation s'éteint.
• Laissez l'appareil refroidir complètement!
• Déconnectez les autres unités, le cas échéant.


Partecipa alla conversazione su questo prodotto
Qui puoi condividere cosa pensi di Tristar PZ-9162 Forno per pizza. Se hai una domanda, leggi prima attentamente il manuale. La richiesta di un manuale può essere effettuata utilizzando il nostro modulo di contatto.