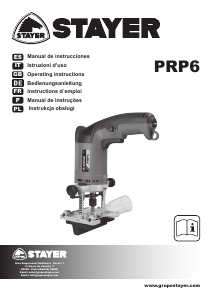
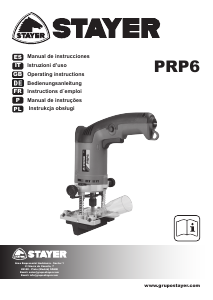
Manuale Stayer PR 6 Fresatrice verticale

Hai bisogno di un manuale per il tuo Stayer PR 6 Fresatrice verticale? Di seguito è possibile visualizzare e scaricare gratuitamente il manuale in PDF in italiano. Questo prodotto ha attualmente 1 domanda frequente, 0 commenti e ha 0 voti. Se questo non è il manuale che desideri, contattaci.

Il tuo prodotto è difettoso e il manuale non fornisce alcuna soluzione? Rivolgiti a un Repair Café per il servizio di riparazione gratuita.

Manuale

Loading…

ENGLISH
6
6
PRP6
Power input W 480
No load speed min
-1
27.000
Collet mm 6-8
Routing depth mm 0-30
Weight Kg 1.6
Intended use
The tool is intended for ush trimming and proling of
wood, plastic and similar materials.
Power supply
The tool should be connected only to a power supply of the
same voltage as indicated on the nameplate, and can only
be operated on single-phase AC supply. They are double-
insulated in accordance with European Standard and can,
therefore, also be used from sockets without earth wire.
Safety hints
For your own safety, please refer to enclosed safety
instructions.
ADDITIONAL SAFETY RULES
1. Hold tool by insulated gripping surfaces when performing
an operation where the cutting tool may contact hidden
wiring or its own cord. Contact with a “live” wire will make
exposed metal parts of the tool “live” and shock the
operator.
2. Wear hearing protection during extended period of
operation.
3. Handle the bits very carefully.
4. Check the bit carefully for cracks or damage before
operation.
Replace cracked or damaged bit immediately.
5. Avoid cutting nails. Inspect for and remove all nails from
the workpiece before operation.
6. Hold the tool rmly.
7. Keep hands away from rotating parts.
8. Make sure the bit is not contacting the workpiece before
the switch is turned on.
9. Before using the tool on an actual workpiece, let it run
for a while.
Watch for vibration or wobbling that could indicate
improperly installed bit.
10. Be careful of the bit rotating direction and the feed
direction.
11. Do not leave the tool running. Operate the tool only
when hand-held.
12. Always switch o󰀨 and wait for the bit to come to a
complete stop before removing the tool from workpiece.
13. Do not touch the bit immediately after operation; it may
be extremely hot and could burn your skin.
14. Always lead the power supply cord away from the tool
towards the rear.
15. Do not smear the tool base carelessly with thinner,
gasoline, oil or the like.
They may cause cracks in the tool base.
16. Draw attention to the need to use cutters of the correct
shank diameter and which are suitable for the speed of
the tool.
SAVE THESE INSTRUCTIONS.
OPERATING INSTRUCTIONS
Installing or removing trimmer bit
Important:
Always be sure that the tool is switched o󰀨 and unplugged
before installing or removing the bit.
To install the router bit, rst lock the spindle by pressing
the black button next to the spindle. Loosen the router bit
retaining nut with the supplied wrench to release the co-
llet. Remove the router bit inserted. Fully insert the router
bit to be installed and tighten the retaining nut rmly.
CAUTION:
• Do not tighten the collet nut without inserting a bit, or the
collet cone will break.
• Use only the wrenches provided with the tool.
Adjustment of the depth of cut
Use the black screw with knurled knob that is located next
to the 0-30mm depth scale. Use the knurled round edge
nut of the screw to x the position. This setting allows to
work with immersion of the cutter from the beginning wi-
thout contacting the work piece, so that the contact will be
established by pushing down the body of the router.
To drill with permanent depth, tighten the two knobs on the
two bright nickel-plated shafts of the machine.
Switch action
CAUTION:
Before plugging in the tool, always be sure that the tool is
switched o󰀨
To turn on the machine, press the on / o󰀨 switch. To stop
it, stop pressing the switch.
The tool, equipped with electronic function, is easy to use
thanks to the following features.
Operation
• Set the tool base on the workpiece to be cut without the
bit making any contact. Then turn the tool on and wait
until the bit attains full speed. Move the tool forward over
the workpiece surface, keeping the tool base ush and
advancing smoothly until the cutting is complete.
• When doing edge cutting, the workpiece surface should
be on the left side of the bit in the feed direction. (Fig. 5)
NOTE:
Moving the tool forward too fast may cause a poor quality
of cut, or damage to the bit or motor. Moving the tool
forward too slowly may burn and mar the cut. The proper
feed rate will depend on the bit size, the kind of workpiece
and depth of cut. Before beginning the cut on the actual
workpiece, it is advisable to make a sample cut on a piece
of scrap lumber. This will show exactly how the cut will
look as well as enable you to check dimensions.
When using the trimmer shoe, the straight guide or the
Scarica il manuale in italiano (PDF, 0.69 MB)
(Rispetta l’ambiente e stampa questo manuale solo se è veramente necessario)

Loading…

Valutazione

Facci sapere che cosa pensi della Stayer PR 6 Fresatrice verticale valutando il prodotto. Vuoi condividere la tua esperienze con questo prodotto o porre una domanda? Ti preghiamo di lasciare un commento al fondo della pagina.
Sei soddisfatto di Stayer PR 6 Fresatrice verticale?
No
Valuta per primo questo prodotto
0 voti

Partecipa alla conversazione su questo prodotto

Qui puoi condividere cosa pensi di Stayer PR 6 Fresatrice verticale. Se hai una domanda, leggi prima attentamente il manuale. La richiesta di un manuale può essere effettuata utilizzando il nostro modulo di contatto.

Maggiori informazioni su questo manuale

Comprendiamo che sia bello avere un manuale cartaceo per i tuoi Stayer PR 6 Fresatrice verticale. Puoi sempre scaricare il manuale dal nostro sito web e stamparlo tu stesso. Se desideri avere un manuale originale, ti consigliamo di contattare Stayer. Potrebbero essere in grado di fornire un manuale originale. Stai cercando il manuale del tuo Stayer PR 6 Fresatrice verticale in un'altra lingua? Scegli la tua lingua preferita sulla nostra home page e cerca il numero del modello per vedere se è disponibile.

Specifiche

Marca Stayer
Modello PR 6
Categoria Fresatrici verticali
Tipo di file PDF
Dimensione del file 0.69 MB

Tutti i manuali per Stayer Fresatrici verticali
Altri manuali di Fresatrici verticali

Domande frequenti su Stayer PR 6 Fresatrice verticale

Il nostro team di supporto cerca informazioni utili sul prodotto e risposte alle domande più frequenti. Se trovi un’inesattezza nelle nostre domande frequenti, ti preghiamo di farcelo sapere utilizzando il nostro modulo di contatto.

Posso riporre gli utensili elettrici in un capannone o in un garage? Verificato

In generale, puoi riporre gli utensili elettrici in un capannone o in un garage, anche se a volte lì gela. Tuttavia, per garantire la durata di vita dell'elettroutensile, è meglio conservarlo in un luogo asciutto e senza forti sbalzi di temperatura. In un capannone o in un garage, le differenze di temperatura possono causare la formazione di condensa, che può causare ruggine. Inoltre, gli strumenti alimentati a batteria durano meno e non si caricano bene a temperature molto basse. Per essere sicuri di come riporre il vostro elettroutensile, leggete sempre attentamente il manuale dell'utente.

È stato utile (6) Per saperne di più
Manuale Stayer PR 6 Fresatrice verticale

Prodotti correlati

Categorie correlate