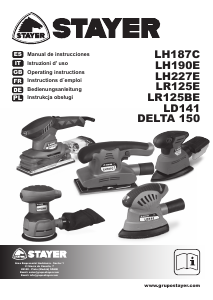
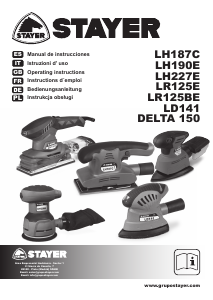
Manuale Stayer DELTA 150 Levigatrice a delta

Hai bisogno di un manuale per il tuo Stayer DELTA 150 Levigatrice a delta? Di seguito è possibile visualizzare e scaricare gratuitamente il manuale in PDF in italiano. Questo prodotto ha attualmente 1 domanda frequente, 0 commenti e ha 0 voti. Se questo non è il manuale che desideri, contattaci.

Il tuo prodotto è difettoso e il manuale non fornisce alcuna soluzione? Rivolgiti a un Repair Café per il servizio di riparazione gratuita.

Manuale

Loading…

ENGLISH
9
9
This manual is consistent with the date of manufacture of
your machine, you will nd information on the technical
data of the machine acquired manual check for updates of
our machines on the website:
www.grupostayer.com
The machine is intended for dry sanding and polishing of
wood, plastic, metal, ller, as well as for painted surfaces.
It is especially suitable for proles, corners or hard to reach
locations. Please refer to the booklet included in delivery
for the safety instructions.
Machine-specic Safety Warnings
Use the machine only for dry sanding. Penetration of water
into the machine increases the risk of an electric shock.
Caution, re hazard! Avoid overheating the object
being sanded as well as the sander. Always
empty the dust collector before taking breaks.
In unfavourable conditions, e. g., when sparks emit from
sanding metals, sanding debris in the dust bag, micro lter
or paper sack (or in the lter sack or lter of the vacuum
cleaner) can self-ignite. Particularly when mixed with
remainders of varnish, polyurethane or other chemical
materials and when the sanding debris is hot after long
periods of working.
Secure the workpiece. A workpiece clamped with
clamping devices or in a vice is held more secure than
by hand.
Keep your workplace clean. Blends of materials are
particularly dangerous. Dust from light alloys can burn
or explode.
Never use the machine with a damaged cable. Do
not touch the damaged cable and pull the mains
plug when the cable is damaged while working.
Damaged cables increase the risk of an electric shock.
Functional Description
Read all safety warnings and all instructions.
Failure to follow the warnings and instructions may
result in electric shock, re and/or serious injury.
Please read the operating instructions carefully before
assembling and using.
Assembly
Fitting the dust bag (Fig. 2)
Fit the dust bag 6, in the vacuum intake 9.
Important! For health safety reasons it is imperative that
you use a dust bag.
Assembly the dust collector box (LH190E g.5)
Place the dust box 6 in the vacuum intake 9.
- Making the notches t into the hopper 6.
- Proceed to rotate in clockwise direction, until it locks.
- To remove the hopper 6, rotate counterclockwise and
pull out.
Fastening the sanding/grinding paper (Fig. 4-6-7-8).
First disconnect the power plug.
- Release the latches 8 on both sides.
- Place the abrasive sanding/grinding sheet outward the
sanding plate
- Place the sanding/grinding sheet edge on the top of
the sanding plate 7 and fasten the front retainer 8
(LH190E).
- Attach sheet sanding/grinding to sanding plate 7. Sure
it is taut.
- Finish attaching the sanding/grinding sheet to the back
retainer 8. (Fig. 4, 7-8).
- Make sure the holes in the sanding/grinding sheet
match the sanding plate 7 for a perfect vacuum.
Punch plate (LH190E, Fig. 9)
It has been provided a punch plate 10 to make holes in the
sandpaper.
- The holes should be lined up with the holes in the
sander base 7.
- Should be placed, as indicated before, the sanding/
grinding sheet.
- Then put the punch plate 10 on a stable level surface,
and proceed to place the sanding plate 7 with the
sanding sheet and placed within the punch plate,
making a little pressure down to punch correctly.
Functions desciption (Fig.1)
1. Front handle
2. ON / OFF switch
3. Speed control*
4. Locking knob
5. Main handle
6. Dust bag/dust collection box (LH190E)
7. Sanding Plate
8. Sandpaper holding retainer
9. Vacuum intake
10. Plate punch sandpaper. (LH190E)
11. Cover dust box.
12. Hepa Filter dust.
*The accessories are optional and do not correspond to the
standard included material.
Placement and Testing
ON/OFF switch (Fig. 3)
To switch on: Press switch 2
Continuous operation: Secure switch 2 with locking knob 4.
To switch o󰀨: Briey hold down switch 2. You can preselect
the speed by turning the knurled screw in switch 2.
LH190 E: Move forward switch 2 for xed nestled operation.
Move backwards to stop.
Scarica il manuale in italiano (PDF, 2.07 MB)
(Rispetta l’ambiente e stampa questo manuale solo se è veramente necessario)

Loading…

Valutazione

Facci sapere che cosa pensi della Stayer DELTA 150 Levigatrice a delta valutando il prodotto. Vuoi condividere la tua esperienze con questo prodotto o porre una domanda? Ti preghiamo di lasciare un commento al fondo della pagina.
Sei soddisfatto di Stayer DELTA 150 Levigatrice a delta?
No
Valuta per primo questo prodotto
0 voti

Partecipa alla conversazione su questo prodotto

Qui puoi condividere cosa pensi di Stayer DELTA 150 Levigatrice a delta. Se hai una domanda, leggi prima attentamente il manuale. La richiesta di un manuale può essere effettuata utilizzando il nostro modulo di contatto.

Maggiori informazioni su questo manuale

Comprendiamo che sia bello avere un manuale cartaceo per i tuoi Stayer DELTA 150 Levigatrice a delta. Puoi sempre scaricare il manuale dal nostro sito web e stamparlo tu stesso. Se desideri avere un manuale originale, ti consigliamo di contattare Stayer. Potrebbero essere in grado di fornire un manuale originale. Stai cercando il manuale del tuo Stayer DELTA 150 Levigatrice a delta in un'altra lingua? Scegli la tua lingua preferita sulla nostra home page e cerca il numero del modello per vedere se è disponibile.

Specifiche

Marca Stayer
Modello DELTA 150
Categoria Levigatrici a delta
Tipo di file PDF
Dimensione del file 2.07 MB

Tutti i manuali per Stayer Levigatrici a delta
Altri manuali di Levigatrici a delta

Domande frequenti su Stayer DELTA 150 Levigatrice a delta

Il nostro team di supporto cerca informazioni utili sul prodotto e risposte alle domande più frequenti. Se trovi un’inesattezza nelle nostre domande frequenti, ti preghiamo di farcelo sapere utilizzando il nostro modulo di contatto.

Posso riporre gli utensili elettrici in un capannone o in un garage? Verificato

In generale, puoi riporre gli utensili elettrici in un capannone o in un garage, anche se a volte lì gela. Tuttavia, per garantire la durata di vita dell'elettroutensile, è meglio conservarlo in un luogo asciutto e senza forti sbalzi di temperatura. In un capannone o in un garage, le differenze di temperatura possono causare la formazione di condensa, che può causare ruggine. Inoltre, gli strumenti alimentati a batteria durano meno e non si caricano bene a temperature molto basse. Per essere sicuri di come riporre il vostro elettroutensile, leggete sempre attentamente il manuale dell'utente.

È stato utile (14) Per saperne di più
Manuale Stayer DELTA 150 Levigatrice a delta

Prodotti correlati

Categorie correlate