Manuale Makita HR2442 Martello perforatore

Hai bisogno di un manuale per il tuo Makita HR2442 Martello perforatore? Di seguito è possibile visualizzare e scaricare gratuitamente il manuale in PDF in italiano. Questo prodotto attualmente ha 4 domande frequenti, 0 commenti e ha 0 voti. Se questo non è il manuale che desideri, contattaci.

Il tuo prodotto è difettoso e il manuale non fornisce alcuna soluzione? Rivolgiti a un Repair Café per il servizio di riparazione gratuita.

Manuale

Loading…

6
OPERATING INSTRUCTIONS
Side grip (auxiliary handle) (Fig. 1)
Always use the side grip to ensure operating safety.
Install the side grip so that the teeth on the grip fit in
between the protrusions on the tool barrel. Then tighten
the grip by turning clockwise at the desired position. It
may be swung 360° so as to be secured at any position.
Installing or removing the bit
CAUTION:
Always be sure that the tool is switched off and
unplugged before installing or removing the bit.
Clean the bit shank and apply bit grease before installing
the bit. (Fig. 2)
Insert the bit into the tool. Turn the bit and push it in until
it engages. (Fig. 3)
After installing, always make sure that the bit is securely
held in place by trying to pull it out.
To remove the bit, pull the chuck cover down all the way
and pull the bit out. (Fig. 4)
Depth gauge (Fig. 5)
The depth gauge is convenient for drilling holes of uni-
form depth. Loosen the side grip and insert the depth
gauge into the hole in the side grip. Adjust the depth
gauge to the desired depth and tighten the side grip.
NOTE:
The depth gauge cannot be used at the position where
the depth gauge strikes against the gear housing.
Switch action (Fig. 6)
CAUTION:
Before plugging in the tool, always check to see that the
switch trigger actuates properly and returns to the “OFF”
position when released.
For Model HR2440, HR2440X, HR2440F and HR2441
To start the tool, simply pull the switch trigger. Tool speed
is increased by increasing pressure on the switch trigger.
Release the switch trigger to stop. For continuous opera-
tion, pull the switch trigger and then push in the lock but-
ton. To stop the tool from the locked position, pull the
switch trigger fully, then release it.
For Model HR2442
To start the tool, simply pull the switch trigger. Release
the switch trigger to stop. For continuous operation, pull
the switch trigger and then push in the lock button. To
stop the tool from the locked position, pull the switch trig-
ger fully, then release it.
Lighting up the lamps (Fig. 6)
For Model HR2440F
CAUTION:
Do not look in the light or see the source of light directly.
To turn on the lamp, pull the trigger. Release the trigger
to turn it off.
NOTE:
Use a dry cloth to wipe the dirt off the lens of lamp. Be
careful not to scratch the lens of lamp, or it may lower the
illumination.
Reversing switch action (Fig. 7)
For Model HR2440, HR2440X, HR2440F
This tool has a reversing switch to change the direction of
rotation. Move the reversing switch lever to the
D
posi-
tion (A side) for clockwise rotation or to the
E
position
(B side) for counterclockwise rotation.
CAUTION:
Always check the direction of rotation before operation.
Use the reversing switch only after the tool comes to a
complete stop. Changing the direction of rotation
before the tool stops may damage the tool.
When you operate the tool in counterclockwise rotation,
the switch trigger is pulled only halfway and the tool
runs at half speed. For counterclockwise rotation, you
cannot push in the lock button.
Selection action mode (Fig. 8)
This tool employs an action mode changing knob. Select
one of the two modes suitable for your work needs by
using this knob. For rotation only, turn the knob so that
the arrow on the knob points toward the
M
symbol on
the tool body. For rotation with hammering, turn the knob
so that the arrow on the knob points toward the
r
sym-
bol on the tool body.
CAUTION:
Always set the knob fully to your desired mode symbol.
If you operate the tool with the knob positioned half-
way between the mode symbols, the tool may be dam-
aged.
Use the knob after the tool comes to a complete stop.
Torque limiter
The torque limiter will actuate when a certain torque level
is reached. The motor will disengage from the output
shaft. When this happens, the bit will stop turning.
CAUTION:
As soon as the torque limiter actuates, switch off the
tool immediately. This will help prevent premature wear
of the tool.
Hole saws cannot be used with this tool. They tend to
pinch or catch easily in the hole. This will cause the
torque limiter to actuate too frequently.
Hammer drilling operation
Position the bit at the desired location for the hole, then
pull the trigger.
Do not force the tool. Light pressure gives best results.
Keep the tool in position and prevent it from slipping away
from the hole.
Do not apply more pressure when the hole becomes
clogged with chips or particles. Instead, run the tool at an
idle, then remove the bit partially from the hole. By
repeating this several times, the hole will be cleaned out
and normal drilling may be resumed.
CAUTION:
There is tremendous and sudden twisting force exerted
on the tool/bit at the time of hole breakthrough, when the
hole becomes clogged with chips and particles, or when
striking reinforcing rods embedded in the concrete.
Always use the side grip (auxiliary handle) and firmly
hold the tool by both side grip and switch handle during
operations. Failure to do so may result in the loss of con-
trol of the tool and potentially severe injury.
Scarica il manuale in italiano (PDF, 0.86 MB)
(Rispetta l’ambiente e stampa questo manuale solo se è veramente necessario)

Loading…

Valutazione

Facci sapere che cosa pensi della Makita HR2442 Martello perforatore valutando il prodotto. Vuoi condividere la tua esperienze con questo prodotto o porre una domanda? Ti preghiamo di lasciare un commento al fondo della pagina.
Sei soddisfatto di Makita HR2442 Martello perforatore?
No
Valuta per primo questo prodotto
0 voti

Partecipa alla conversazione su questo prodotto

Qui puoi condividere cosa pensi di Makita HR2442 Martello perforatore. Se hai una domanda, leggi prima attentamente il manuale. La richiesta di un manuale può essere effettuata utilizzando il nostro modulo di contatto.

Maggiori informazioni su questo manuale

Comprendiamo che sia bello avere un manuale cartaceo per i tuoi Makita HR2442 Martello perforatore. Puoi sempre scaricare il manuale dal nostro sito web e stamparlo tu stesso. Se desideri avere un manuale originale, ti consigliamo di contattare Makita. Potrebbero essere in grado di fornire un manuale originale. Stai cercando il manuale del tuo Makita HR2442 Martello perforatore in un'altra lingua? Scegli la tua lingua preferita sulla nostra home page e cerca il numero del modello per vedere se è disponibile.

Specifiche

Marca Makita
Modello HR2442
Categoria Martelli perforatori
Tipo di file PDF
Dimensione del file 0.86 MB

Tutti i manuali per Makita Martelli perforatori
Altri manuali di Martelli perforatori

Domande frequenti su Makita HR2442 Martello perforatore

Il nostro team di supporto cerca informazioni utili sul prodotto e risposte alle domande più frequenti. Se trovi un’inesattezza nelle nostre domande frequenti, ti preghiamo di farcelo sapere utilizzando il nostro modulo di contatto.

Qual è la differenza tra un trapano a percussione e un martello perforatore? Verificato

I trapani a percussione possono essere utilizzati per effettuare fori nei muri di mattoni e a malta. Per effettuare fori in muri di cemento, è necessario un martello perforatore.

È stato utile (260) Per saperne di più

Cosa indicano i Joule (J) in relazione ai martelli rotanti? Verificato

Il numero di Joule è un’indicazione dell’impatto energetico del martello rotante. Per scavare fori regolari nel cemento, è sufficiente un martello rotante di 2,2 J.

È stato utile (219) Per saperne di più

Devo indossare una protezione per l'udito quando utilizzo un trapano? Verificato

Si, dovresti. Sebbene la quantità di rumore prodotta da un trapano possa variare a seconda della marca e del modello, l'esposizione a lungo termine a rumori forti può causare danni permanenti all'udito. Ecco perché è una buona idea indossare una protezione per l'udito.

È stato utile (138) Per saperne di più

Posso riporre gli utensili elettrici in un capannone o in un garage? Verificato

In generale, puoi riporre gli utensili elettrici in un capannone o in un garage, anche se a volte lì gela. Tuttavia, per garantire la durata di vita dell'elettroutensile, è meglio conservarlo in un luogo asciutto e senza forti sbalzi di temperatura. In un capannone o in un garage, le differenze di temperatura possono causare la formazione di condensa, che può causare ruggine. Inoltre, gli strumenti alimentati a batteria durano meno e non si caricano bene a temperature molto basse. Per essere sicuri di come riporre il vostro elettroutensile, leggete sempre attentamente il manuale dell'utente.

È stato utile (70) Per saperne di più
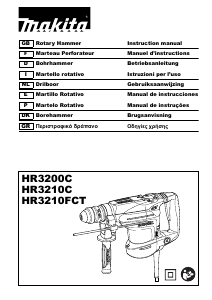
Manuale Makita HR2442 Martello perforatore

Prodotti correlati

Categorie correlate

×
Download