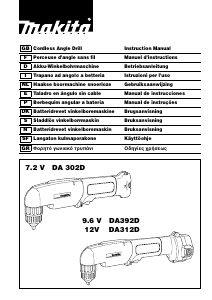
Manuale Makita DDA340 Trapano avvitatore

Hai bisogno di un manuale per il tuo Makita DDA340 Trapano avvitatore? Di seguito è possibile visualizzare e scaricare gratuitamente il manuale in PDF in italiano. Questo prodotto attualmente ha 3 domande frequenti, 0 commenti e ha 0 voti. Se questo non è il manuale che desideri, contattaci.

Il tuo prodotto è difettoso e il manuale non fornisce alcuna soluzione? Rivolgiti a un Repair Café per il servizio di riparazione gratuita.

Manuale

Loading…

5
Tips for maintaining maximum battery life
1. Charge the battery cartridge before completely
discharged.
Always stop tool operation and charge the bat-
tery cartridge when you notice less tool power.
2. Never recharge a fully charged battery cartridge.
Overcharging shortens the battery service life.
3. Charge the battery cartridge with room tempera-
ture at 10°C 40°C (50°F 104°F). Let a hot bat-
tery cartridge cool down before charging it.
4. Charge the battery cartridge once in every six
months if you do not use it for a long period of
time.
FUNCTIONAL DESCRIPTION
CAUTION:
Always be sure that the tool is switched off and the bat-
tery cartridge is removed before adjusting or checking
function on the tool.
Installing or removing battery cartridge (Fig. 1)
Always switch off the tool before installing or removing
of the battery cartridge.
• To remove the battery cartridge, slide it from the tool
while sliding the button on the front of the cartridge.
To install the battery cartridge, align the tongue on the
battery cartridge with the groove in the housing and slip
it into place. Always insert it all the way until it locks in
place with a little click. If you can see the red indicator
on the upper side of the button, it is not locked com-
pletely. Install it fully until the red indicator cannot be
seen. If not, it may accidentally fall out of the tool, caus-
ing injury to you or someone around you.
Do not use force when installing the battery cartridge. If
the cartridge does not slide in easily, it is not being
inserted correctly.
Battery protection system (Lithium-ion battery
with star marking) (Fig. 2)
Lithium-ion batteries with a star marking are equipped
with a protection system. This system automatically cuts
off power to the tool to extend battery life.
The tool will automatically stop during operation if the
tool and/or battery are placed under one of the following
conditions:
Overloaded:
The tool is operated in a manner that causes it to
draw an abnormally high current.
In this situation, release the trigger switch on the tool
and stop the application that caused the tool to
become overloaded. Then pull the trigger switch
again to restart.
If the tool does not start, the battery is overheated.
In this situation, let the battery cool before pulling the
trigger switch again.
Low battery voltage:
The remaining battery capacity is too low and the
tool will not operate. In this situation, remove and
recharge the battery.
Switch action (Fig. 3)
CAUTION:
Before inserting the battery cartridge into the tool,
always check to see that the switch trigger actuates
properly and returns to the “OFF” position when
released.
To start the tool, simply pull the switch trigger. Tool speed
is increased by increasing pressure on the switch trigger.
Release the switch trigger to stop.
CAUTION:
Be sure to hold the tool firmly before the tool is
switched off.
Lighting up the front lamp (Fig. 4)
CAUTION:
Do not look in the light or see the source of light directly.
Pull the switch trigger to light up the lamp. The lamp
keeps on lighting while the switch trigger is being pulled.
The light automatically goes out 10 15 seconds after
the switch trigger is released.
NOTE:
Use a dry cloth to wipe the dirt off the lens of lamp. Be
careful not to scratch the lens of lamp, or it may lower
the illumination.
Reversing switch action (Fig. 5)
This tool has a reversing switch to change the direction of
rotation. Depress the reversing switch lever from the A
side for clockwise rotation or from the B side for counter-
clockwise rotation.
When the reversing switch lever is in the neutral position,
the switch trigger cannot be pulled.
CAUTION:
Always check the direction of rotation before operation.
Use the reversing switch only after the tool comes to a
complete stop. Changing the direction of rotation
before the tool stops may damage the tool.
When not operating the tool, always set the reversing
switch lever to the neutral position.
ASSEMBLY
CAUTION:
Always be sure that the tool is switched off and the bat-
tery cartridge is removed before carrying out any work
on the tool.
Installing side grip (auxiliary handle) (Fig. 6)
CAUTION:
Always be sure that the side grip is installed securely
before operation.
Screw the side grip on the tool securely. The side grip
can be installed on either side of the tool, whichever is
convenient.
Installing or removing drill bit (Fig. 7)
To install the bit, place it in the chuck as far as it will go.
Tighten the chuck by hand. Place the chuck key in each
of the three holes and tighten clockwise. Be sure to
tighten all three chuck holes evenly.
To remove the bit, turn the chuck key counterclockwise in
just one hole, then loosen the chuck by hand.
After use, return the chuck key to the storage cavity on
the tool.
Chuck key holder (Fig. 8)
To install the chuck key holder, fix it to the convex portion
of the tool housing on either side and then secure it with a
screw. To remove, loosen the screw and then take it out.
Hook (Fig. 9)
The hook is convenient for temporarily hanging the tool.
This can be installed on either side of the tool.
Scarica il manuale in italiano (PDF, 0.87 MB)
(Rispetta l’ambiente e stampa questo manuale solo se è veramente necessario)

Loading…

Valutazione

Facci sapere che cosa pensi della Makita DDA340 Trapano avvitatore valutando il prodotto. Vuoi condividere la tua esperienze con questo prodotto o porre una domanda? Ti preghiamo di lasciare un commento al fondo della pagina.
Sei soddisfatto di Makita DDA340 Trapano avvitatore?
No
Valuta per primo questo prodotto
0 voti

Partecipa alla conversazione su questo prodotto

Qui puoi condividere cosa pensi di Makita DDA340 Trapano avvitatore. Se hai una domanda, leggi prima attentamente il manuale. La richiesta di un manuale può essere effettuata utilizzando il nostro modulo di contatto.

Maggiori informazioni su questo manuale

Comprendiamo che sia bello avere un manuale cartaceo per i tuoi Makita DDA340 Trapano avvitatore. Puoi sempre scaricare il manuale dal nostro sito web e stamparlo tu stesso. Se desideri avere un manuale originale, ti consigliamo di contattare Makita. Potrebbero essere in grado di fornire un manuale originale. Stai cercando il manuale del tuo Makita DDA340 Trapano avvitatore in un'altra lingua? Scegli la tua lingua preferita sulla nostra home page e cerca il numero del modello per vedere se è disponibile.

Specifiche

Marca Makita
Modello DDA340
Categoria Trapani avvitatori
Tipo di file PDF
Dimensione del file 0.87 MB

Tutti i manuali per Makita Trapani avvitatori
Altri manuali di Trapani avvitatori

Domande frequenti su Makita DDA340 Trapano avvitatore

Il nostro team di supporto cerca informazioni utili sul prodotto e risposte alle domande più frequenti. Se trovi un’inesattezza nelle nostre domande frequenti, ti preghiamo di farcelo sapere utilizzando il nostro modulo di contatto.

Continuo a spogliare la testa della vite quando uso il trapano avvitatore. Perché? Verificato

La maggior parte dei trapani avvitatori può essere impostata per avvitare più forte o più morbida. Se la testa continua a essere spogliata, il trapano dovrebbe probabilmente essere messo in una posizione diversa. Quando si tratta di un dispositivo wireless, assicurati sempre che la batteria sia carica per un risultato ottimale.

È stato utile (96) Per saperne di più

Devo indossare una protezione per l'udito quando utilizzo un trapano? Verificato

Si, dovresti. Sebbene la quantità di rumore prodotta da un trapano possa variare a seconda della marca e del modello, l'esposizione a lungo termine a rumori forti può causare danni permanenti all'udito. Ecco perché è una buona idea indossare una protezione per l'udito.

È stato utile (37) Per saperne di più

Posso riporre gli utensili elettrici in un capannone o in un garage? Verificato

In generale, puoi riporre gli utensili elettrici in un capannone o in un garage, anche se a volte lì gela. Tuttavia, per garantire la durata di vita dell'elettroutensile, è meglio conservarlo in un luogo asciutto e senza forti sbalzi di temperatura. In un capannone o in un garage, le differenze di temperatura possono causare la formazione di condensa, che può causare ruggine. Inoltre, gli strumenti alimentati a batteria durano meno e non si caricano bene a temperature molto basse. Per essere sicuri di come riporre il vostro elettroutensile, leggete sempre attentamente il manuale dell'utente.

È stato utile (29) Per saperne di più
Manuale Makita DDA340 Trapano avvitatore

Prodotti correlati

Categorie correlate

×
Download