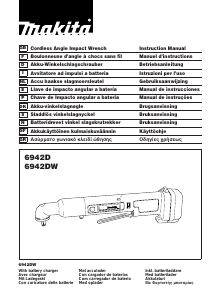
Manuale Makita 6942DW Avvitatore pneumatico

Hai bisogno di un manuale per il tuo Makita 6942DW Avvitatore pneumatico? Di seguito è possibile visualizzare e scaricare gratuitamente il manuale in PDF in italiano. Questo prodotto ha attualmente 1 domanda frequente, 0 commenti e ha 0 voti. Se questo non è il manuale che desideri, contattaci.

Il tuo prodotto è difettoso e il manuale non fornisce alcuna soluzione? Rivolgiti a un Repair Café per il servizio di riparazione gratuita.

Manuale

Loading…

ADDITIONAL SAFETY RULES
FOR MACHINE
1. Be aware that this machine is always in an
operating condition, because it does not have
to be plugged into an electrical outlet.
2. Wear ear protectors.
3. Check the socket carefully for wear, cracks or
damage before installation.
4. Hold the machine firmly.
5. Always be sure you have a firm footing. Be
sure no one is below when using the machine
in high locations.
6. The proper fastening torque may differ
depending upon the kind or size of the bolt.
Check the torque with a torque wrench.
7. When driving into walls, floors or wherever
‘live’’electrical wires may be encountered, DO
NOT TOUCH ANY METAL PARTS OF THE
TOOL! Hold the machine only by the insulated
grasping surfaces to prevent electric shock if
you drive into a ‘‘live’ wire.
SAVE THESE INSTRUCTIONS.
OPERATING INSTRUCTIONS
Installing or removing battery cartridge
(Fig. 1)
Always switch off the machine before insertion or
removal of the battery cartridge.
To remove the battery cartridge, pull out the set
plate on the machine and grasp both sides of the
cartridge while withdrawing it from the machine.
To insert the battery cartridge, align the tongue on
the battery cartridge with the groove in the housing
and slip it into place. Snap the set plate back into
place. Be sure to close the set plate fully before
using the machine.
Do not use force when inserting the battery car-
tridge. If the cartridge does not slide in easily, it is
not being inserted correctly.
Charging (Fig. 2)
1. Plug the battery charger into your power source.
2. Insert the battery cartridge so that the plus and
minus terminals on the battery cartridge are on the
same sides as their respective markings on the
battery charger. Insert the cartridge fully into the
port so that it rests on the charger port floor.
3. When the battery cartridge is inserted, the charg-
ing light color will flash in red color and charging
will begin.
4. When charging is completed, the charging light
goes out. The charging time is as follows:
Battery 7000, 7100, 7120, 9000, 9100, 9100A,
9120: approx. 60 minutes.
5. If you leave the battery cartridge in the charger
after the charging cycle is complete, the charger
will switch into its ‘‘trickle charge (maintenance
charge)’’ mode.
6. After charging, remove the battery cartridge from
the charger and unplug the charger from the
power source.
Battery type
Capacity
(mAh)
Number of
cells
9100 1,300 8
CAUTION:
The battery charger is for charging Makita battery
cartridge. Never use it for other purposes or for
other manufacturer’s batteries.
When you charge a new battery cartridge or a
battery cartridge which has not been used for a long
period of time, it may not accept a full charge. This
is a normal condition and does not indicate a
problem. You can recharge the battery cartridge
fully after discharging it completely and recharging a
couple of times.
When you charge a battery cartridge from a just-
operated machine or a battery cartridge which has
been left in a location exposed to direct sunlight or
heat for a long time, let it cool off. Then re-insert it
and try to charge it once more.
When you charge a new battery cartridge or a
battery cartridge which has not been used for a long
period, sometimes the charging light will go out
soon. If this occurs, remove the battery cartridge
and re-insert it. If the charging light goes out within
one minute even after repeating this procedure a
couple of times, the battery cartridge is dead.
Replace it with a new one.
Trickle charge (Maintenance charge)
If you leave the battery cartridge in the charger to
prevent spontaneous discharging after full charge,
the charger will switch into its ‘‘trickle charge (main-
tenance charge)’’ mode and keep the battery car-
tridge fresh and fully charged.
Tips for maintaining maximum battery life
1. Charge the battery cartridge before completely
discharged.
Always stop machine operation and charge the
battery cartridge when you notice less machine
power.
2. Never recharge a fully charged battery cartridge.
Overcharging shortens the battery service life.
3. Charge the battery cartridge with room tempera-
ture at 10°C 40°C (50°F 104°F).
Let a hot battery cartridge cool down before
charging it.
Adjusting the angle head (Fig.3&4)
Important:
Always be sure that the machine is switched off and
the battery cartridge is removed before adjusting the
angle head.
The angle head can be adjusted 360° (8 positions in
45-degree increments). To adjust it, loosen the hex
bolt and remove the angle head. Adjust the angle
head to the desired position and reinstall it so that the
teeth on the housing will match up with the grooves in
the angle head. Then tighten the hex bolt to secure
the angle head.
4
Scarica il manuale in italiano (PDF, 0.26 MB)
(Rispetta l’ambiente e stampa questo manuale solo se è veramente necessario)

Loading…

Valutazione

Facci sapere che cosa pensi della Makita 6942DW Avvitatore pneumatico valutando il prodotto. Vuoi condividere la tua esperienze con questo prodotto o porre una domanda? Ti preghiamo di lasciare un commento al fondo della pagina.
Sei soddisfatto di Makita 6942DW Avvitatore pneumatico?
No
Valuta per primo questo prodotto
0 voti

Partecipa alla conversazione su questo prodotto

Qui puoi condividere cosa pensi di Makita 6942DW Avvitatore pneumatico. Se hai una domanda, leggi prima attentamente il manuale. La richiesta di un manuale può essere effettuata utilizzando il nostro modulo di contatto.

Maggiori informazioni su questo manuale

Comprendiamo che sia bello avere un manuale cartaceo per i tuoi Makita 6942DW Avvitatore pneumatico. Puoi sempre scaricare il manuale dal nostro sito web e stamparlo tu stesso. Se desideri avere un manuale originale, ti consigliamo di contattare Makita. Potrebbero essere in grado di fornire un manuale originale. Stai cercando il manuale del tuo Makita 6942DW Avvitatore pneumatico in un'altra lingua? Scegli la tua lingua preferita sulla nostra home page e cerca il numero del modello per vedere se è disponibile.

Specifiche

Marca Makita
Modello 6942DW
Categoria Avvitatori pneumatici
Tipo di file PDF
Dimensione del file 0.26 MB

Tutti i manuali per Makita Avvitatori pneumatici
Altri manuali di Avvitatori pneumatici

Domande frequenti su Makita 6942DW Avvitatore pneumatico

Il nostro team di supporto cerca informazioni utili sul prodotto e risposte alle domande più frequenti. Se trovi un’inesattezza nelle nostre domande frequenti, ti preghiamo di farcelo sapere utilizzando il nostro modulo di contatto.

Posso riporre gli utensili elettrici in un capannone o in un garage? Verificato

In generale, puoi riporre gli utensili elettrici in un capannone o in un garage, anche se a volte lì gela. Tuttavia, per garantire la durata di vita dell'elettroutensile, è meglio conservarlo in un luogo asciutto e senza forti sbalzi di temperatura. In un capannone o in un garage, le differenze di temperatura possono causare la formazione di condensa, che può causare ruggine. Inoltre, gli strumenti alimentati a batteria durano meno e non si caricano bene a temperature molto basse. Per essere sicuri di come riporre il vostro elettroutensile, leggete sempre attentamente il manuale dell'utente.

È stato utile (6) Per saperne di più
Manuale Makita 6942DW Avvitatore pneumatico

Prodotti correlati

Categorie correlate