Manuale Denver TRC-1400 Stazione meteorologica

Hai bisogno di un manuale per il tuo Denver TRC-1400 Stazione meteorologica? Di seguito è possibile visualizzare e scaricare gratuitamente il manuale in PDF in italiano. Questo prodotto attualmente ha 5 domande frequenti, 0 commenti e ha 0 voti. Se questo non è il manuale che desideri, contattaci.

Il tuo prodotto è difettoso e il manuale non fornisce alcuna soluzione? Rivolgiti a un Repair Café per il servizio di riparazione gratuita.

Manuale

Loading…

~ P. 2 ~~ P. 1 ~
INDOOR & WIRELESS OUTDOOR THERMOMETER
WITH REAL TIME CLOCK & SNOOZE ALARM
MODEL: 883F01
INSTRUCTION MANUAL
1. INTRODUCTION
Thank you for purchasing our In/Outdoor thermometer with wireless thermometer sensor and real time clock. The
main unit is designed to receive temperature signals from maximum 3 remote sensors in different locations, and it is
also equipped with a snooze alarm. To ensure proper operations, please read this instruction manual carefully and
save it for future reference.
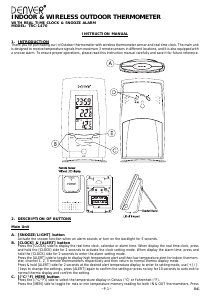
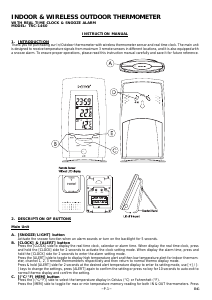
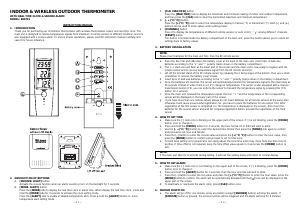
2. DESCRIPTION OF BUTTONS
A. [SNOOZE/LIGHT] button
Activate the snooze function when an alarm sounds or turn on the backlight for 5 seconds.
B. [MODE ALERT] button
Press the [MODE] side to display the real time clock or alarm time. When display the real time clock, press and
hold the [MODE] side for 3 seconds to activate the clock setting mode.
Press the [ALERT] side to enable or disable temperature alert. Press & hold the [ALERT] button to enter
temperature alert setting mode.
C. [CLR MAX/MIN] button
Press the [MAX/MIN] side to display the maximum and minimum reading of indoor and outdoor temperature,
and then press the [CLR] side to clear the memorized maximum and minimum temperature.
D. [- +(°C/°F)] button
Press the [+(°C/°F)] side to select the temperature display in Celsius (°C) or Fahrenheit (°F). Both [-] and [+]
buttons can be used to enter values under setting mode.
E. [CHANNEL] button
Press it to display the temperatures of different remote sensors or auto scroll (
) among different channels.
F. [RESET] button
This button is located inside the battery compartment of the main unit, press this button allows you to return all
settings back to factory values.
3. BATTERY INSTALLATION
a. Press the door tab and slide down the battery cover at the back of the main unit. Insert 2pcs of AAA size
batteries according to the “+” and “-” polarity marks shown in the battery compartment.
b. The (---) dash icon will flash at the lower part of the screen and the main unit is now ready to register with the
remote sensor and to receive temperature signal from the RF remote sensor(s).
c. Lift off the bracket stand of the RF remote sensor by releasing the 2 fixing snaps at the bottom, then use a small
screwdriver to remove the battery cover screws.
d. Insert 2pcs of AAA size batteries according to the “+” and “-” polarity marks shown in the battery compartment.
e. Once the batteries are inserted, the sensor will automatically transmit the temperature signal to the main body at
30 seconds interval or when there is a 0.2°C change in temperature. The sensor is also equipped with a manual
transmission button (TX), you can enforce the sensor to transmit the temperature signal by pressing this (TX)
button for 2 seconds.
f. Once the main unit received the temperature signal, the icon “ 1 ” and the temperature of the corresponding
sensor will be displayed on the lower part of the screen.
g. If you have more than one remote sensor, please do not insert batteries for all remote sensors at the same time
otherwise it will cause unsuccessful registration. So, you have to place the batteries for one sensor first. After
registration of the first sensor is completed (i.e. the temperature is displayed on the screen), then insert the
batteries for the second sensor and wait for complete registration before proceed the registration of the third
sensor.
4. HOW TO SET TIME
a. Make sure the [:] colon icon is blinking on the upper part of the screen, if [:] is not blinking, press the [MODE]
button once to change it.
b. Press and hold the [MODE] button for 3 seconds, the hour format 12 or 24hr will start to blink.
c. Use the [- +(°C/°F)] button to select the desired time format then press the [MODE] side again to confirm
and proceed to set hour and minute.
d. Press the [-] button to enter the minute value and press the [+(°C/°F)] button to enter the hour value, then
press the [MODE] button to confirm and proceed to set T2 time zone.
e. T2 time zone setting is for people who can easily adjust the local time when they move from one time zone to
another. If time offset is not required, keep the time offset value equals to 0 and press the [MODE] button to
exit.
5. HOW TO SET ALARM
a. Make sure the [:] colon icon is not blinking on the upper part of the screen, if [:] is blinking, press the [MODE]
button once to change it.
b. Press and hold the [ALERT] button for 3 seconds, then the hour and min will start to blink.
c. Press the [-] button to enter the min value and press the [+(°C/°F)] button to enter the hour value, press the
[MODE] button to confirm, the alarm will be automatically activated and the [
] icon will be displayed on the
upper part of the screen.
d. To deactivate or reactivate the alarm clock, press [CLR] button once.
6. SNOOZE FUNCTION
a. The alarm will go off for one minute, press any button (except [SNOOZE] button) will stop the alarm. If
[SNOOZE] button is pressed, the snooze function will be triggered and the alarm will stop for 8 minutes.
NOTE:
If the main unit idles for 8 seconds during setting, it will exit the setting mode and return to normal display.
NOTE:
Please insert batteries for the main unit first, then the RF remote sensor.
Scarica il manuale in italiano (PDF, 0.72 MB)
(Rispetta l’ambiente e stampa questo manuale solo se è veramente necessario)

Loading…

Valutazione

Facci sapere che cosa pensi della Denver TRC-1400 Stazione meteorologica valutando il prodotto. Vuoi condividere la tua esperienze con questo prodotto o porre una domanda? Ti preghiamo di lasciare un commento al fondo della pagina.
Sei soddisfatto di Denver TRC-1400 Stazione meteorologica?
No
Valuta per primo questo prodotto
0 voti

Partecipa alla conversazione su questo prodotto

Qui puoi condividere cosa pensi di Denver TRC-1400 Stazione meteorologica. Se hai una domanda, leggi prima attentamente il manuale. La richiesta di un manuale può essere effettuata utilizzando il nostro modulo di contatto.

Maggiori informazioni su questo manuale

Comprendiamo che sia bello avere un manuale cartaceo per i tuoi Denver TRC-1400 Stazione meteorologica. Puoi sempre scaricare il manuale dal nostro sito web e stamparlo tu stesso. Se desideri avere un manuale originale, ti consigliamo di contattare Denver. Potrebbero essere in grado di fornire un manuale originale. Stai cercando il manuale del tuo Denver TRC-1400 Stazione meteorologica in un'altra lingua? Scegli la tua lingua preferita sulla nostra home page e cerca il numero del modello per vedere se è disponibile.

Specifiche

Marca Denver
Modello TRC-1400
Categoria Stazioni meteorologica
Tipo di file PDF
Dimensione del file 0.72 MB

Tutti i manuali per Denver Stazioni meteorologica
Altri manuali di Stazioni meteorologica

Domande frequenti su Denver TRC-1400 Stazione meteorologica

Il nostro team di supporto cerca informazioni utili sul prodotto e risposte alle domande più frequenti. Se trovi un’inesattezza nelle nostre domande frequenti, ti preghiamo di farcelo sapere utilizzando il nostro modulo di contatto.

La mia stazione meteo prevedeva pioggia, ma non è successo. Come mai? Verificato

Le previsioni della stazione metereologica si basano sulla pressione dell'aria. In genere bassa pressione significa cattivo tempo e alta pressione bel tempo. È possibile che le condizioni del tempo siano diverse dalle previsioni della pressione dell’aria.

È stato utile (1403) Per saperne di più

Qual è il punto ideale in cui installare una stazione meteo e i relativi sensori? Verificato

La stazione meteo deve essere posizionata al chiuso e deve essere tenuta lontano da fonti di calore come cucina, finestre e dispositivi elettrici. Un sensore di temperatura esterna deve essere posizionato all’ombra e ad almeno 1,25 m da terra. Un sensore di pioggia deve essere posizionato in un’area aperta dove può sempre raccogliere la pioggia. Un sensore di vento deve essere posizionato in un’area aperta, senza ostacoli al vento.

È stato utile (334) Per saperne di più

La mia stazione meteo dispone di un pluviometro, può misurare anche la quantità di neve caduta? Verificato

Alcuni pluviometri sono dotati di un elemento riscaldante, che consente di sciogliere la neve e misurare quindi anche le precipitazioni di neve. Senza l’elemento riscaldante il pluviometro si intasa e non può effettuare misurazioni.

È stato utile (234) Per saperne di più

Posso lasciare una batteria sostituibile in un dispositivo per molto tempo? Verificato

Le batterie sostituibili possono restare in un dispositivo a lungo se il dispositivo è in uso. Quando si ripone un dispositivo per molto tempo, si consiglia di rimuovere le batterie sostituibili per evitare l’ossidazione.

È stato utile (234) Per saperne di più

Una pila del dispositivo si è ossidata, posso utilizzarlo ancora? Verificato

Sì, il dispositivo si può utilizzare ancora. Prima di tutto, rimuovere la pila ossidata. Non farlo mai a mani nude. Pulire quindi il vano della batteria con un cotton fioc bagnato di aceto o succo di limone. Lasciar asciugare e inserire le nuove pile.

È stato utile (233) Per saperne di più
Manuale Denver TRC-1400 Stazione meteorologica

Prodotti correlati

Categorie correlate