Manuale Cyborg F.L.Y 9 (for PlayStation 3) Gamepad

Hai bisogno di un manuale per il tuo Cyborg F.L.Y 9 (for PlayStation 3) Gamepad? Di seguito è possibile visualizzare e scaricare gratuitamente il manuale in PDF in italiano. Questo prodotto attualmente ha 2 domande frequenti, 0 commenti e ha 0 voti. Se questo non è il manuale che desideri, contattaci.

Il tuo prodotto è difettoso e il manuale non fornisce alcuna soluzione? Rivolgiti a un Repair Café per il servizio di riparazione gratuita.

Manuale

Loading…

[2] [3]
ENGLISH Cyborg F.L.Y. 9 Wireless Flight Stick
Thank you for purchasing the Cyborg F.L.Y. 9 Wireless Flight Stick for use with the PlayStation 3 video game system. Be sure to register your product
online at www.madcatz.com and check out our full line of other quality video game accessories.
IMPORTANT! Before using the PlayStation 3 system with this product, read the PlayStation 3 system instruction manual for safety, health, and other
information regarding the use of the PlayStation 3 system.
All questions regarding the console should be directed to the manufacturer.
GENERAL SETUP
CONNECTING YOUR CONTROLLER TO YOUR PS3 SYSTEM
Up to four controllers, wired and wireless, can be actively connected to a PlayStation 3 console at one time. Each connected controller is assigned a
player indicator number. To connect a wireless controller, a player indicator number must be free (unlit).
1. Insert 2 (two) AA batteries into the battery compartment.
2. Insert the USB receiver into any available USB port on the PS3 – the receiver’s Red LED will flash.
3. Power ON the Wireless Flight Stick – the 4 (four) controller port indicator LEDs located at the top of the Flight Stick will rapidly flash while the
Flight Stick is searching for a signal.
4. Once a connection has been established, the 4 (four) LEDs will flash less rapidly and the receiver’s LED will turn solid.
5. Press the Home Button (located between Start and Select) on the Flight Stick. The PS3 will automatically assign a player number – from 1 (one) to 7 (seven).
6. The assigned player number will be indicated by the LEDs at the top of the Flight Stick:
a. Player 1 (one) – the LED above the # 1 (one) position will be lit.
b. Player 6 (six) – the LEDs above the # 2 (two) and # 4 (four) positions will be lit. Refer to your PS3’s instruction manual for more information.
SETTING UP YOUR WIRELESS FLIGHT STICK
A. Attach the Flight Stick handle to the base by inserting it into the base collar and tightening the securing screw.
B. Remove the adjustment tool from the compartment on the Flight Stick base.
C. Press the locking switch (c1) and move the Flight Stick up or down to adjust the height.
D. Insert the adjustment tool in the locking nut (d2) and turn counter-clockwise. Press the locking pin (d1) in and move the stick forward or backwards
to the required angle. Lock by turning locking nut (d2) clockwise.
E. Insert the adjustment tool into the locking nut (e1) and turn counter-clockwise. Move to the desired angle and lock by turning the locking nut clockwise.
LAP-MOUNT OPTIONS
To make it easier to use your Flight Stick on your lap, we have added 4 (four) lap-mount brackets. To attach the brackets, turn the Flight Stick over.
Each bracket will display the letter L or R. The L brackets will attach onto the left side and the R brackets will attach onto the right side. To attach,
push the brackets into the securing holes (f1) and with all brackets in place, slide the lock catches (f2) into place.
CONFIGURING YOUR WIRELESS FLIGHT STICK FOR DIFFERENT GAME TITLES
Your Flight Stick has two modes which configure controls for specific flying games. You can switch between modes by sliding the switch on the right
side of the Flight Stick base to either mode M1 or M2. In mode M1, all controls will have the default labeled function - please see your game manual.
Mode M1 (Page 4) - Your Flight Stick buttons and controls are configured to play IL-2 Sturmovik, Tom Clancy: HAWX, or any future flight simulation games.
Mode M2 (Page 5) - Your Flight Stick buttons and controls are configured to play Blazing Angels 1 and 2.
FREQUENTLY ASKED QUESTIONS (FAQ)
QUESTION: When I have the Cyborg F.L.Y. 9 Flight Stick plugged into my PS3, I cannot navigate the XMB (XrossMediaBar) menu correctly.
ANSWER: Ensure the throttle is set to the “0” (neutral) position. If the throttle is engaged all the way up or down, you may experience the XMB menu
moving unexpectedly. When the Flight Stick is in mode 2, the throttle emulates the analog stick on a standard gaming controller used to navigate the
XMB menu.
QUESTION: My Flight Stick is not functioning at all. The LEDs surrounding the Home button are flashing, but there is no response in the XMB menu or game.
ANSWER 1
: Ensure fresh batteries are in the Flight Stick. If the battery level is too low, you may experience loss of connection to the USB dongle and console.
ANSWER 2:
Pair again (synchronize) the USB dongle with the Flight Stick:
1. Insert USB dongle into PS3 console.
2. Power ON Flight Stick by pushing Home button.
3. Simultaneously hold down both the Home button and the L3 (left stick button) for 5-10 seconds.
4. If successfully paired, the player indicator LEDs surrounding the Home button will no longer flash, and one of those LEDs will stay lit.
A B C D E
c1
d1
d2
e1
F
f1
f2
Scarica il manuale in italiano (PDF, 0.46 MB)
(Rispetta l’ambiente e stampa questo manuale solo se è veramente necessario)

Loading…

Valutazione

Facci sapere che cosa pensi della Cyborg F.L.Y 9 (for PlayStation 3) Gamepad valutando il prodotto. Vuoi condividere la tua esperienze con questo prodotto o porre una domanda? Ti preghiamo di lasciare un commento al fondo della pagina.
Sei soddisfatto di Cyborg F.L.Y 9 (for PlayStation 3) Gamepad?
No
Valuta per primo questo prodotto
0 voti

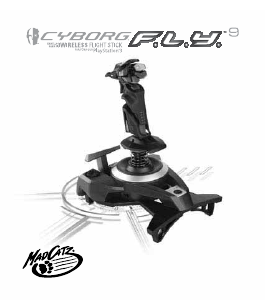
Partecipa alla conversazione su questo prodotto

Qui puoi condividere cosa pensi di Cyborg F.L.Y 9 (for PlayStation 3) Gamepad. Se hai una domanda, leggi prima attentamente il manuale. La richiesta di un manuale può essere effettuata utilizzando il nostro modulo di contatto.

Maggiori informazioni su questo manuale

Comprendiamo che sia bello avere un manuale cartaceo per i tuoi Cyborg F.L.Y 9 (for PlayStation 3) Gamepad. Puoi sempre scaricare il manuale dal nostro sito web e stamparlo tu stesso. Se desideri avere un manuale originale, ti consigliamo di contattare Cyborg. Potrebbero essere in grado di fornire un manuale originale. Stai cercando il manuale del tuo Cyborg F.L.Y 9 (for PlayStation 3) Gamepad in un'altra lingua? Scegli la tua lingua preferita sulla nostra home page e cerca il numero del modello per vedere se è disponibile.

Specifiche

Marca Cyborg
Modello F.L.Y 9 (for PlayStation 3)
Categoria Gamepad
Tipo di file PDF
Dimensione del file 0.46 MB

Tutti i manuali per Cyborg Gamepad
Altri manuali di Gamepad

Domande frequenti su Cyborg F.L.Y 9 (for PlayStation 3) Gamepad

Il nostro team di supporto cerca informazioni utili sul prodotto e risposte alle domande più frequenti. Se trovi un’inesattezza nelle nostre domande frequenti, ti preghiamo di farcelo sapere utilizzando il nostro modulo di contatto.

Una batteria del mio dispositivo è ossidata, posso comunque usarla in sicurezza? Verificato

Sì, il dispositivo può ancora essere utilizzato in sicurezza. In primo luogo, rimuovere la batteria ossidata. Non usare mai le mani nude per farlo. Quindi pulire il vano batteria con un batuffolo di cotone imbevuto di aceto o succo di limone. Lascia asciugare e inserisci nuove batterie.

È stato utile (143) Per saperne di più

Posso avvolgere il cavo attorno al dispositivo dopo l'uso? Verificato

È meglio non farlo, perché può danneggiare il cavo. La cosa migliore da fare è avvolgere il cavo come era quando il prodotto è stato confezionato.

È stato utile (109) Per saperne di più
Manuale Cyborg F.L.Y 9 (for PlayStation 3) Gamepad

Prodotti correlati

Categorie correlate